Inspiration is a crazy thing. While waiting for the paint to dry on one project, I decided to look up a good pattern of lips for another project. While searching the interwebs, I came across a great ampersand cross stitch. The one I saw was super cute, but someone was charging $50 for it. What the what? No bueno! I loved the look of it so much, I really wanted to make one. Then I dawned on me that with all the peeps I know getting married this year (seriously, everyone!) I could make one with their names on it as well. Besides, everyone needs an awesome neo-granny craft in their life! Now my grandma never taught me to cross stitch, so I learned everything from Needle ‘n Thread. It’s just like learning from grandma…only on the computer…and no one is fussing at you to sit up straight.
Get your granny style on after the jump! Allons-y!


What you’ll need:
- Two different colors of embroidery floss
- Piece of felt
- Tracing paper
- Pencil or pen
- Embroidery hoop and needle
- Scissors
- Circular frame*

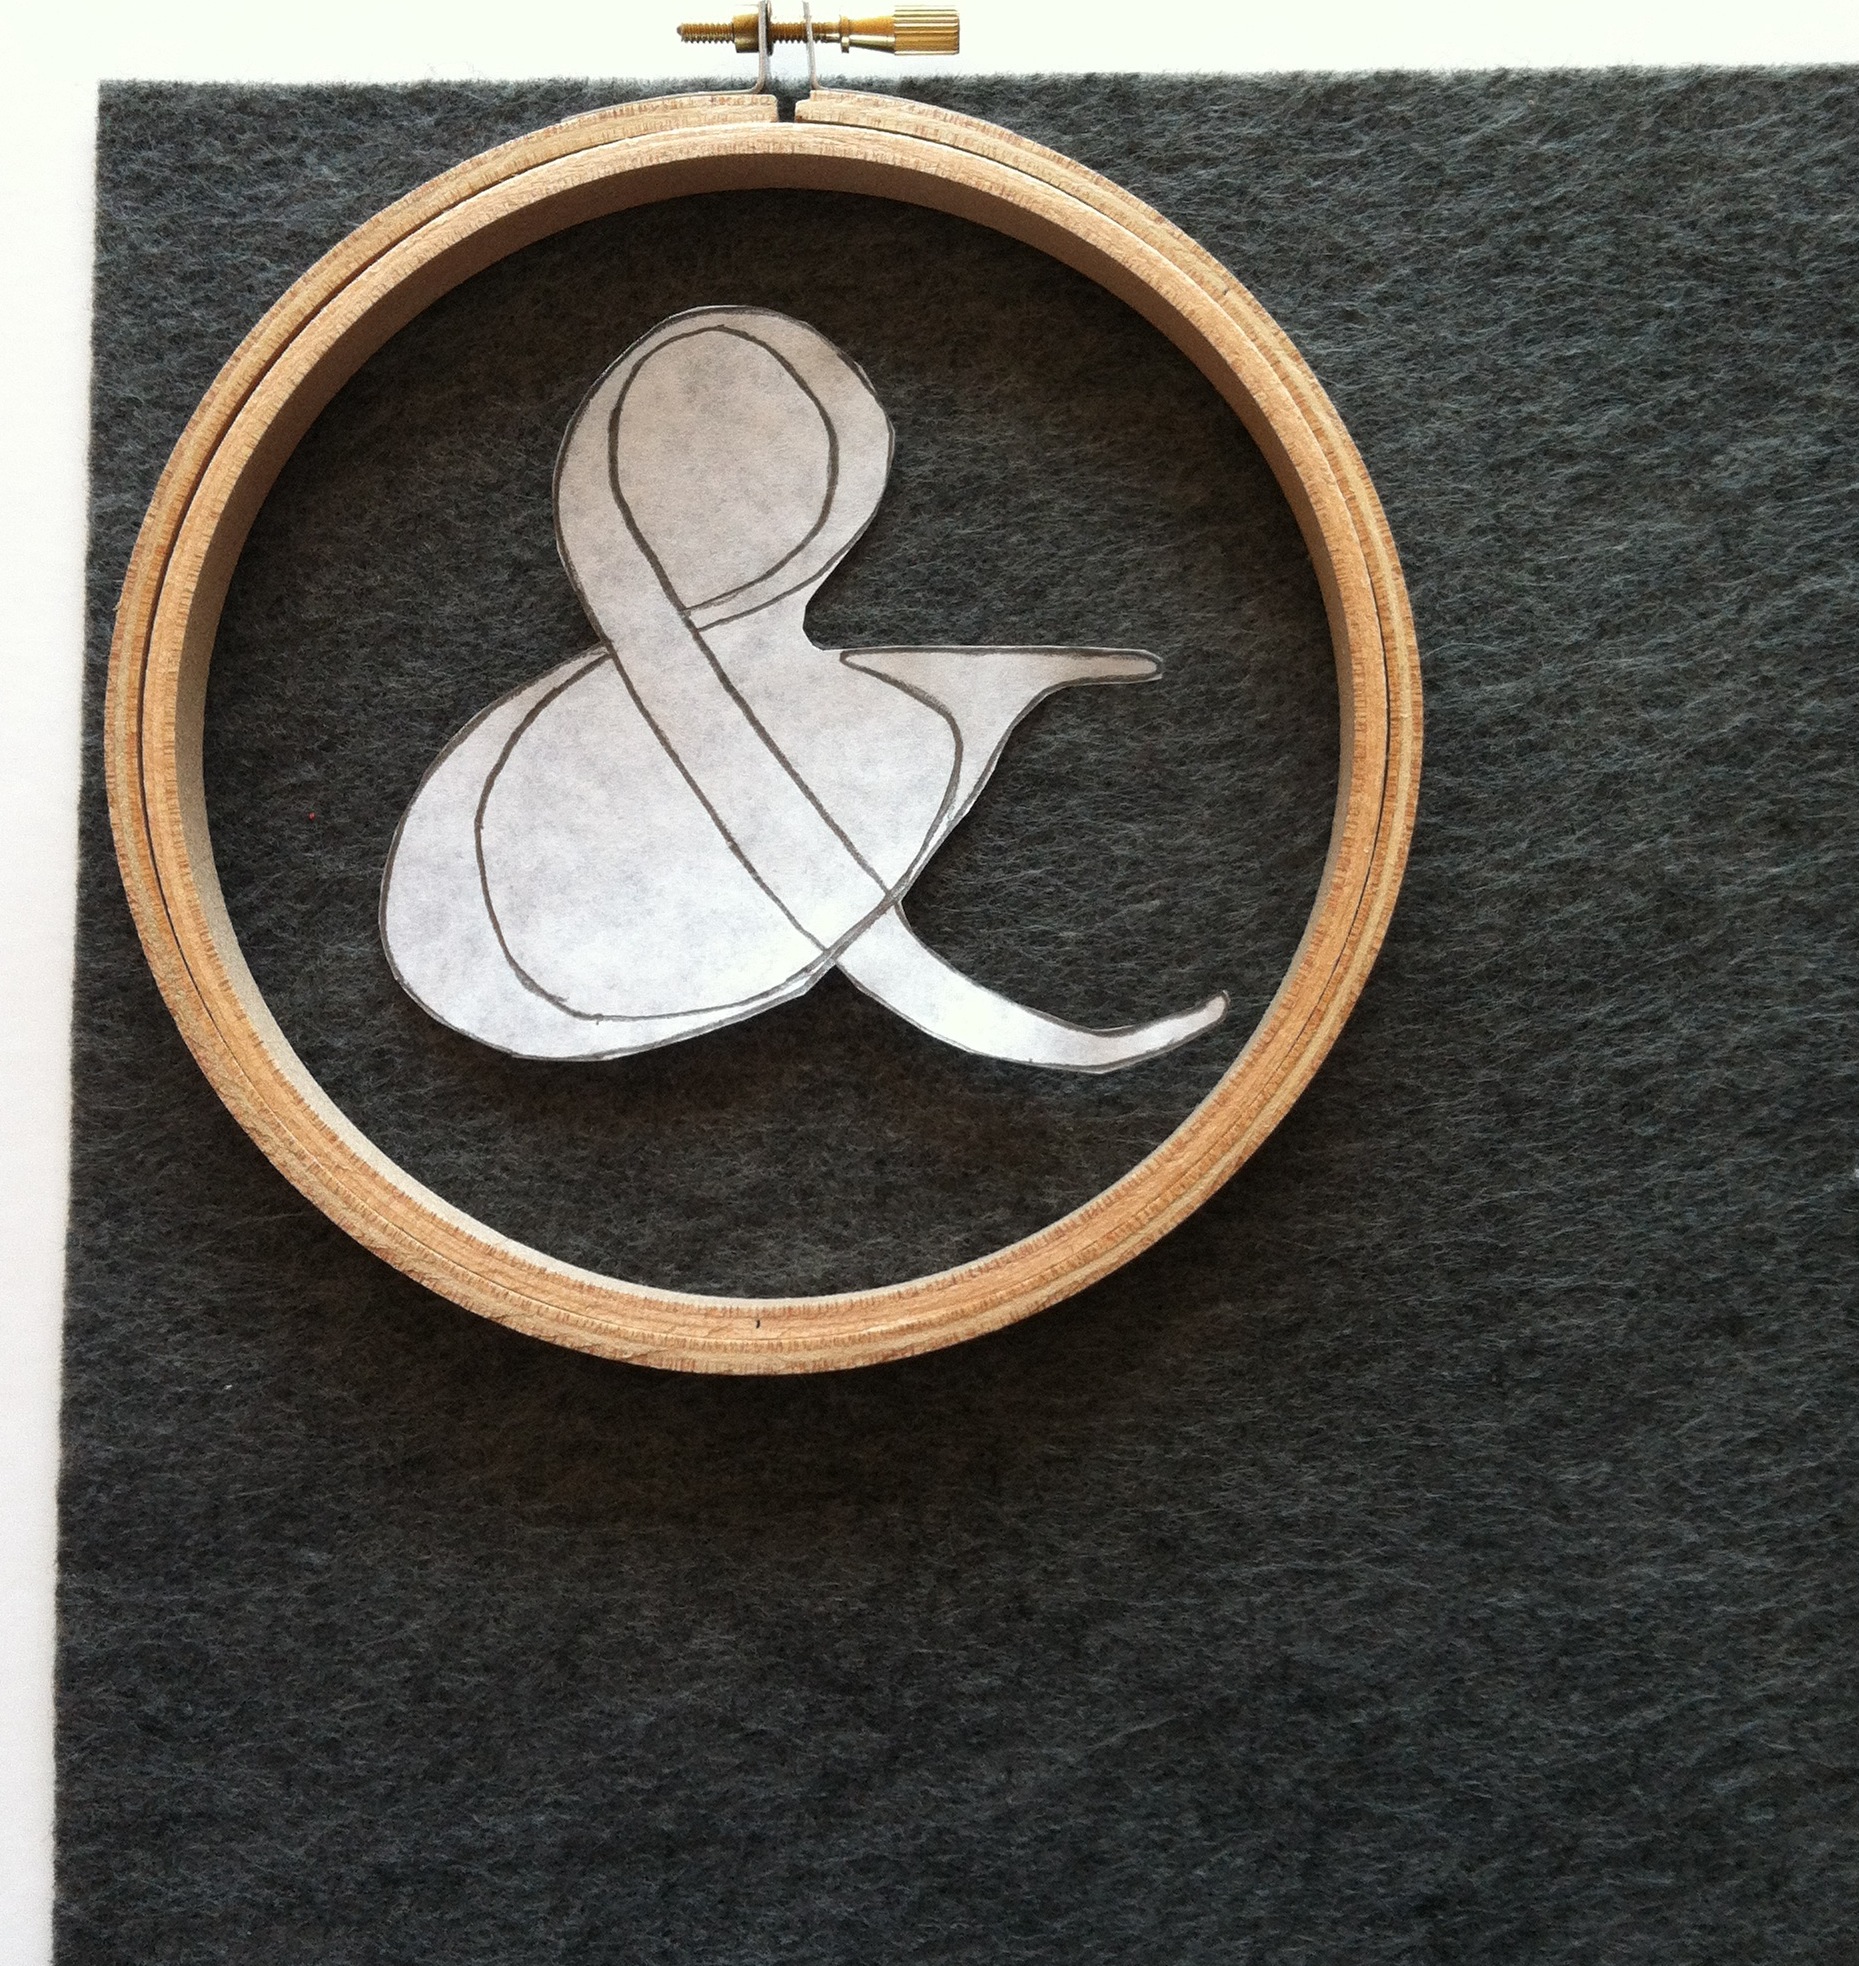
Step 1: Find an ampersand you like, and print it out or just trace it off the computer screen with tracing paper (I found mine in MS Word). Make sure it is the size you want it to be. I planned on framing mine so I went for a size I thought would fit in a circular frame.
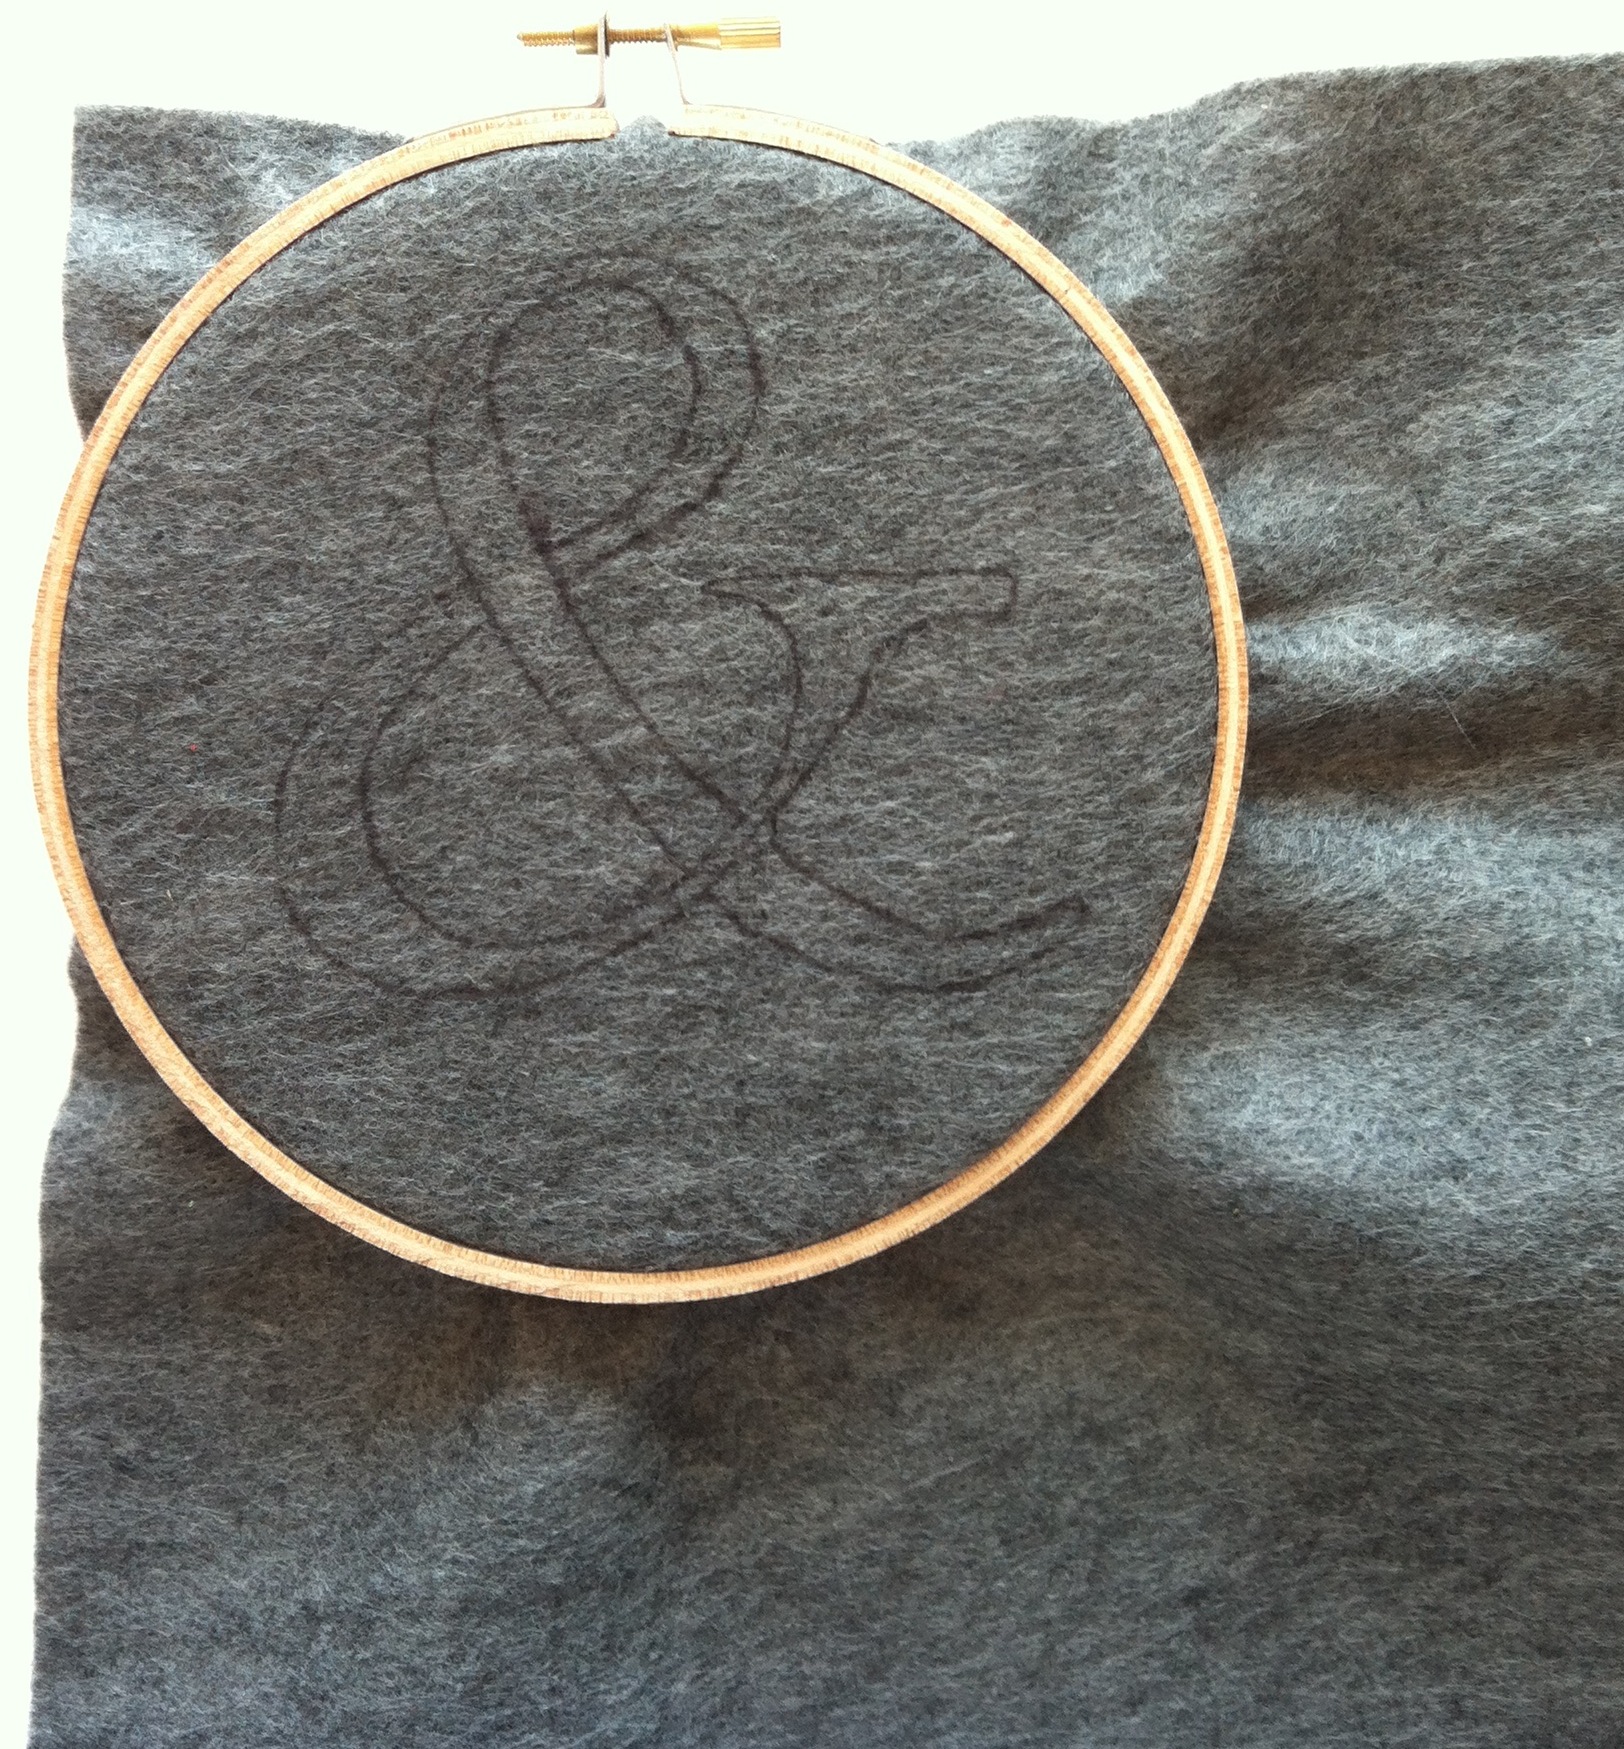
Step 2: Cut out the ampersand and trace it on the felt. I used a charcoal gray so I had to trace it with a permanent marker. But make sure the outline isn’t too thick, you want the thread to cover it completely.
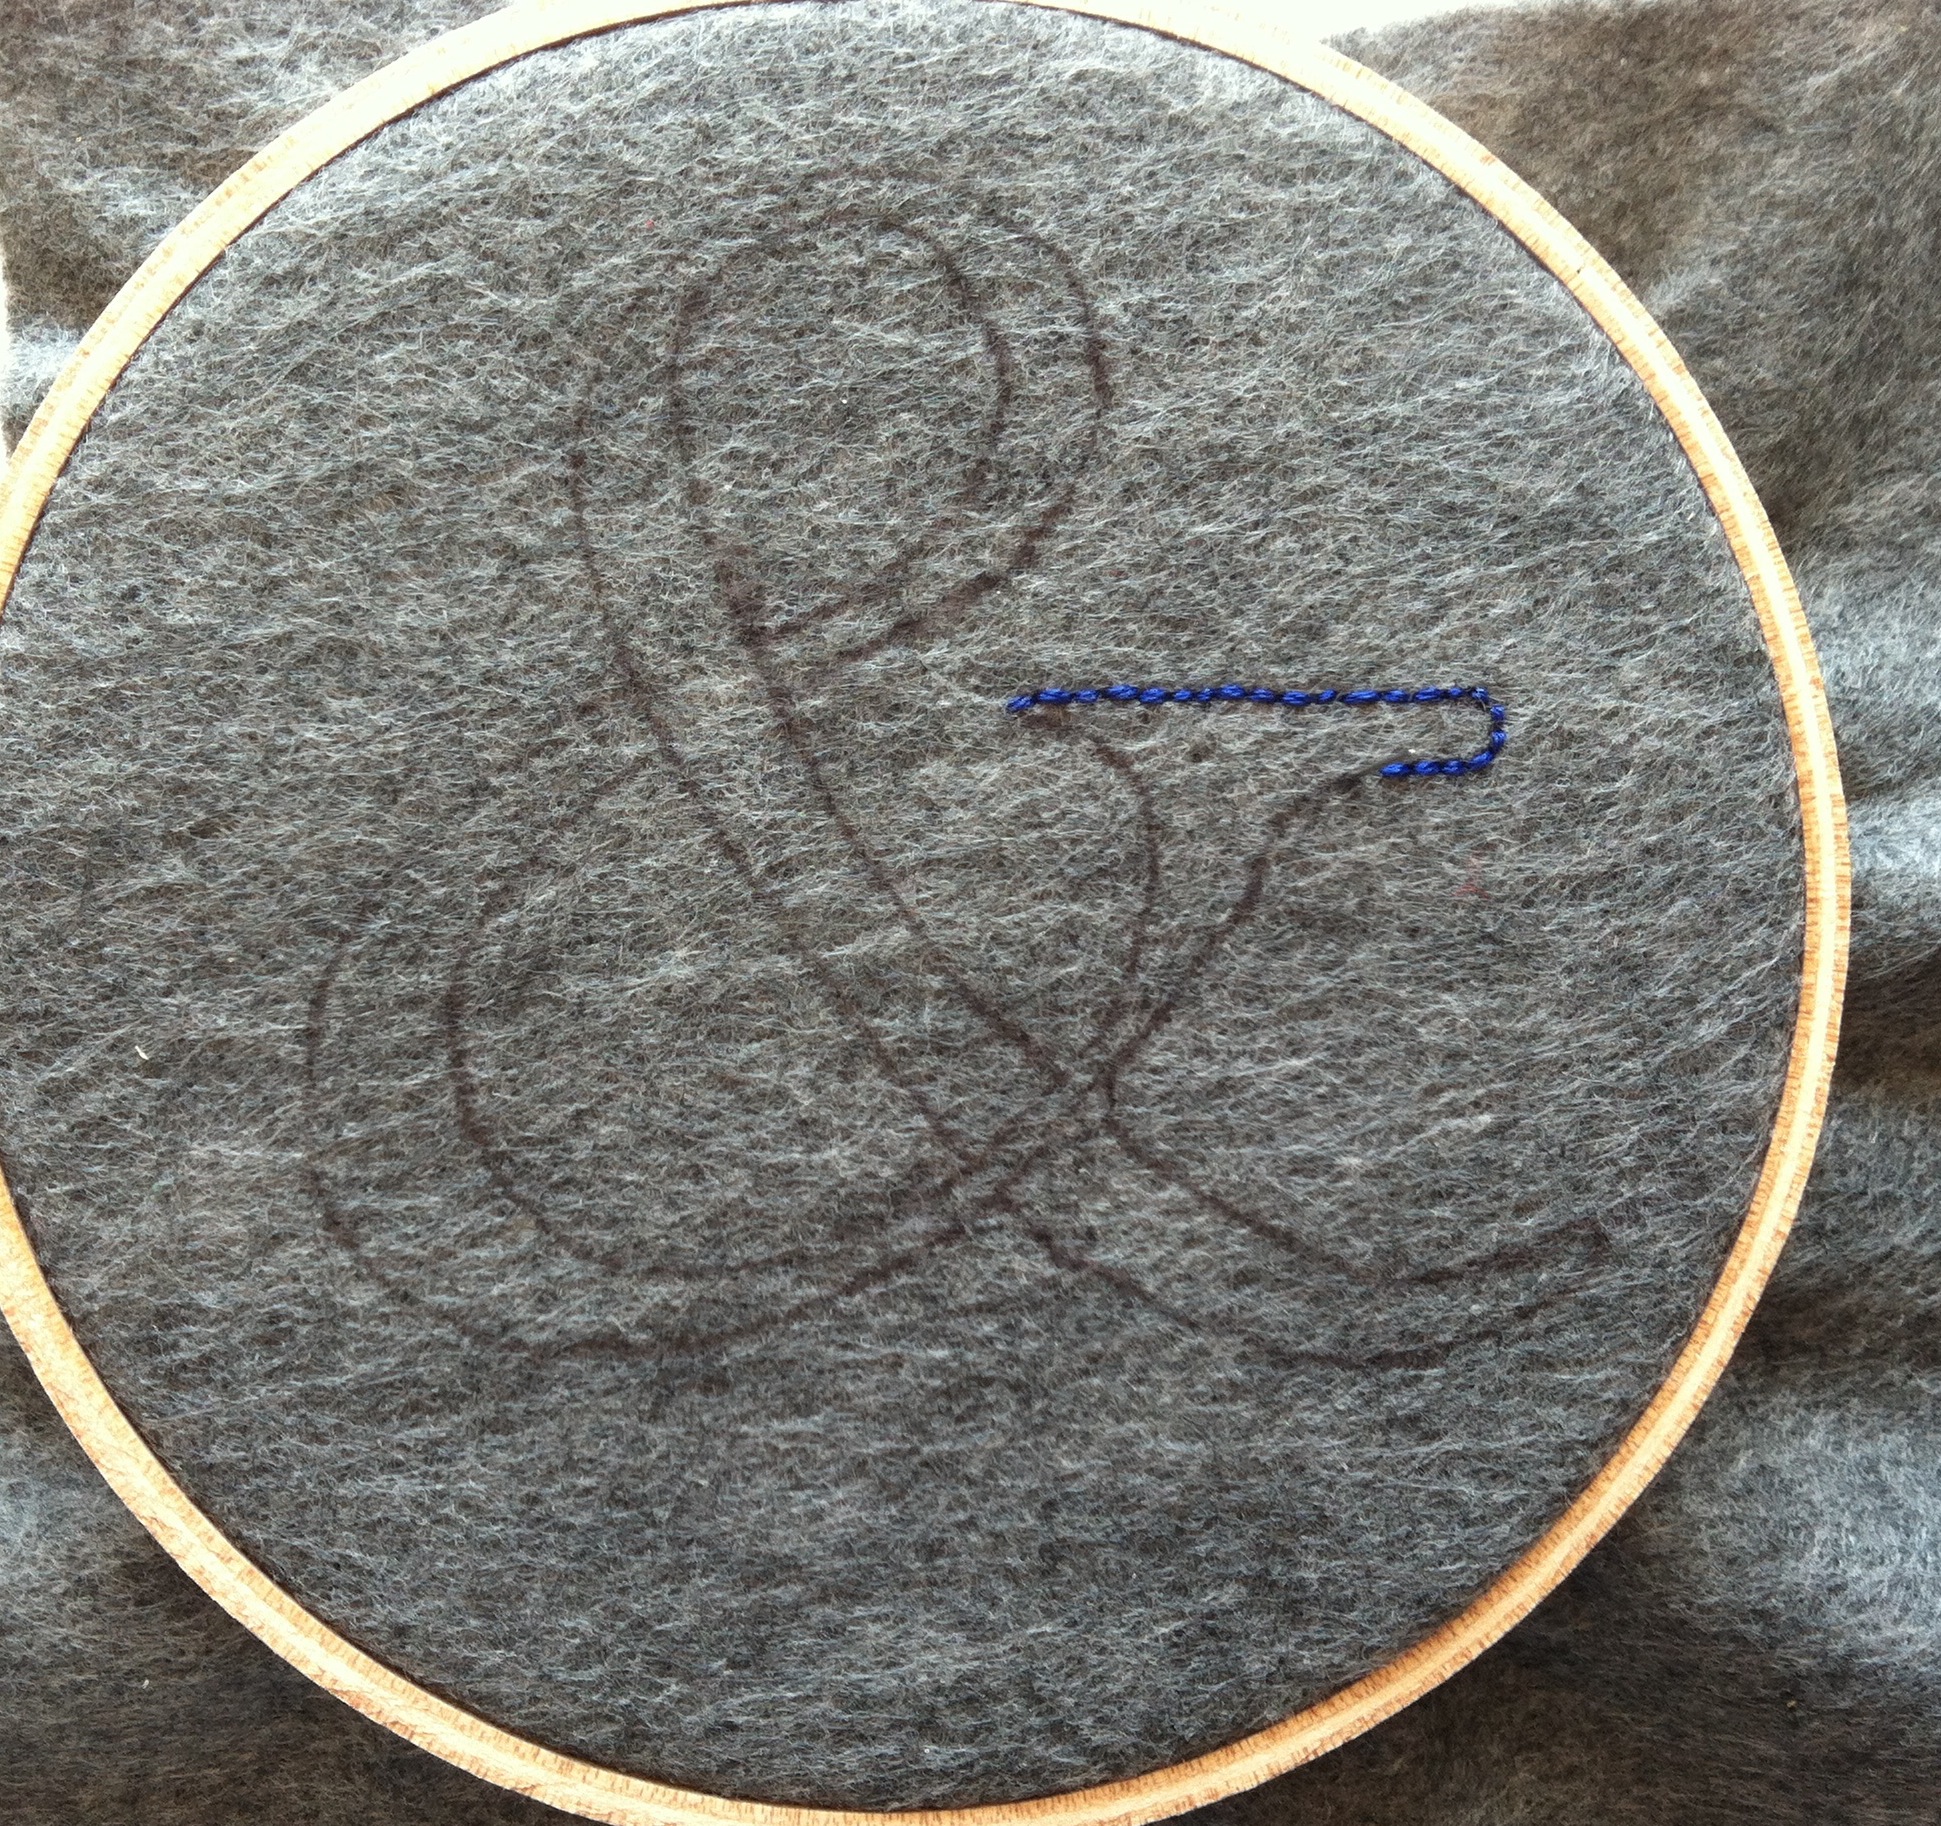
Step 3: You have your outline to guide you, so get to stitching! I used a simple backstitch in the darker blue for mine, but feel free to get fancy with it!


Step 4: For the names, I used a lighter blue (to make the names pop more). I used a running stitch (since I was “writing” in cursive and wanted it to be legible).
Feel free to practice the placement, size, and style you want the names on a spare bit of paper (I sure did!) You can even use a pen to make an outline like with the ampersand. Or if you’re feeling bold, freehand it!

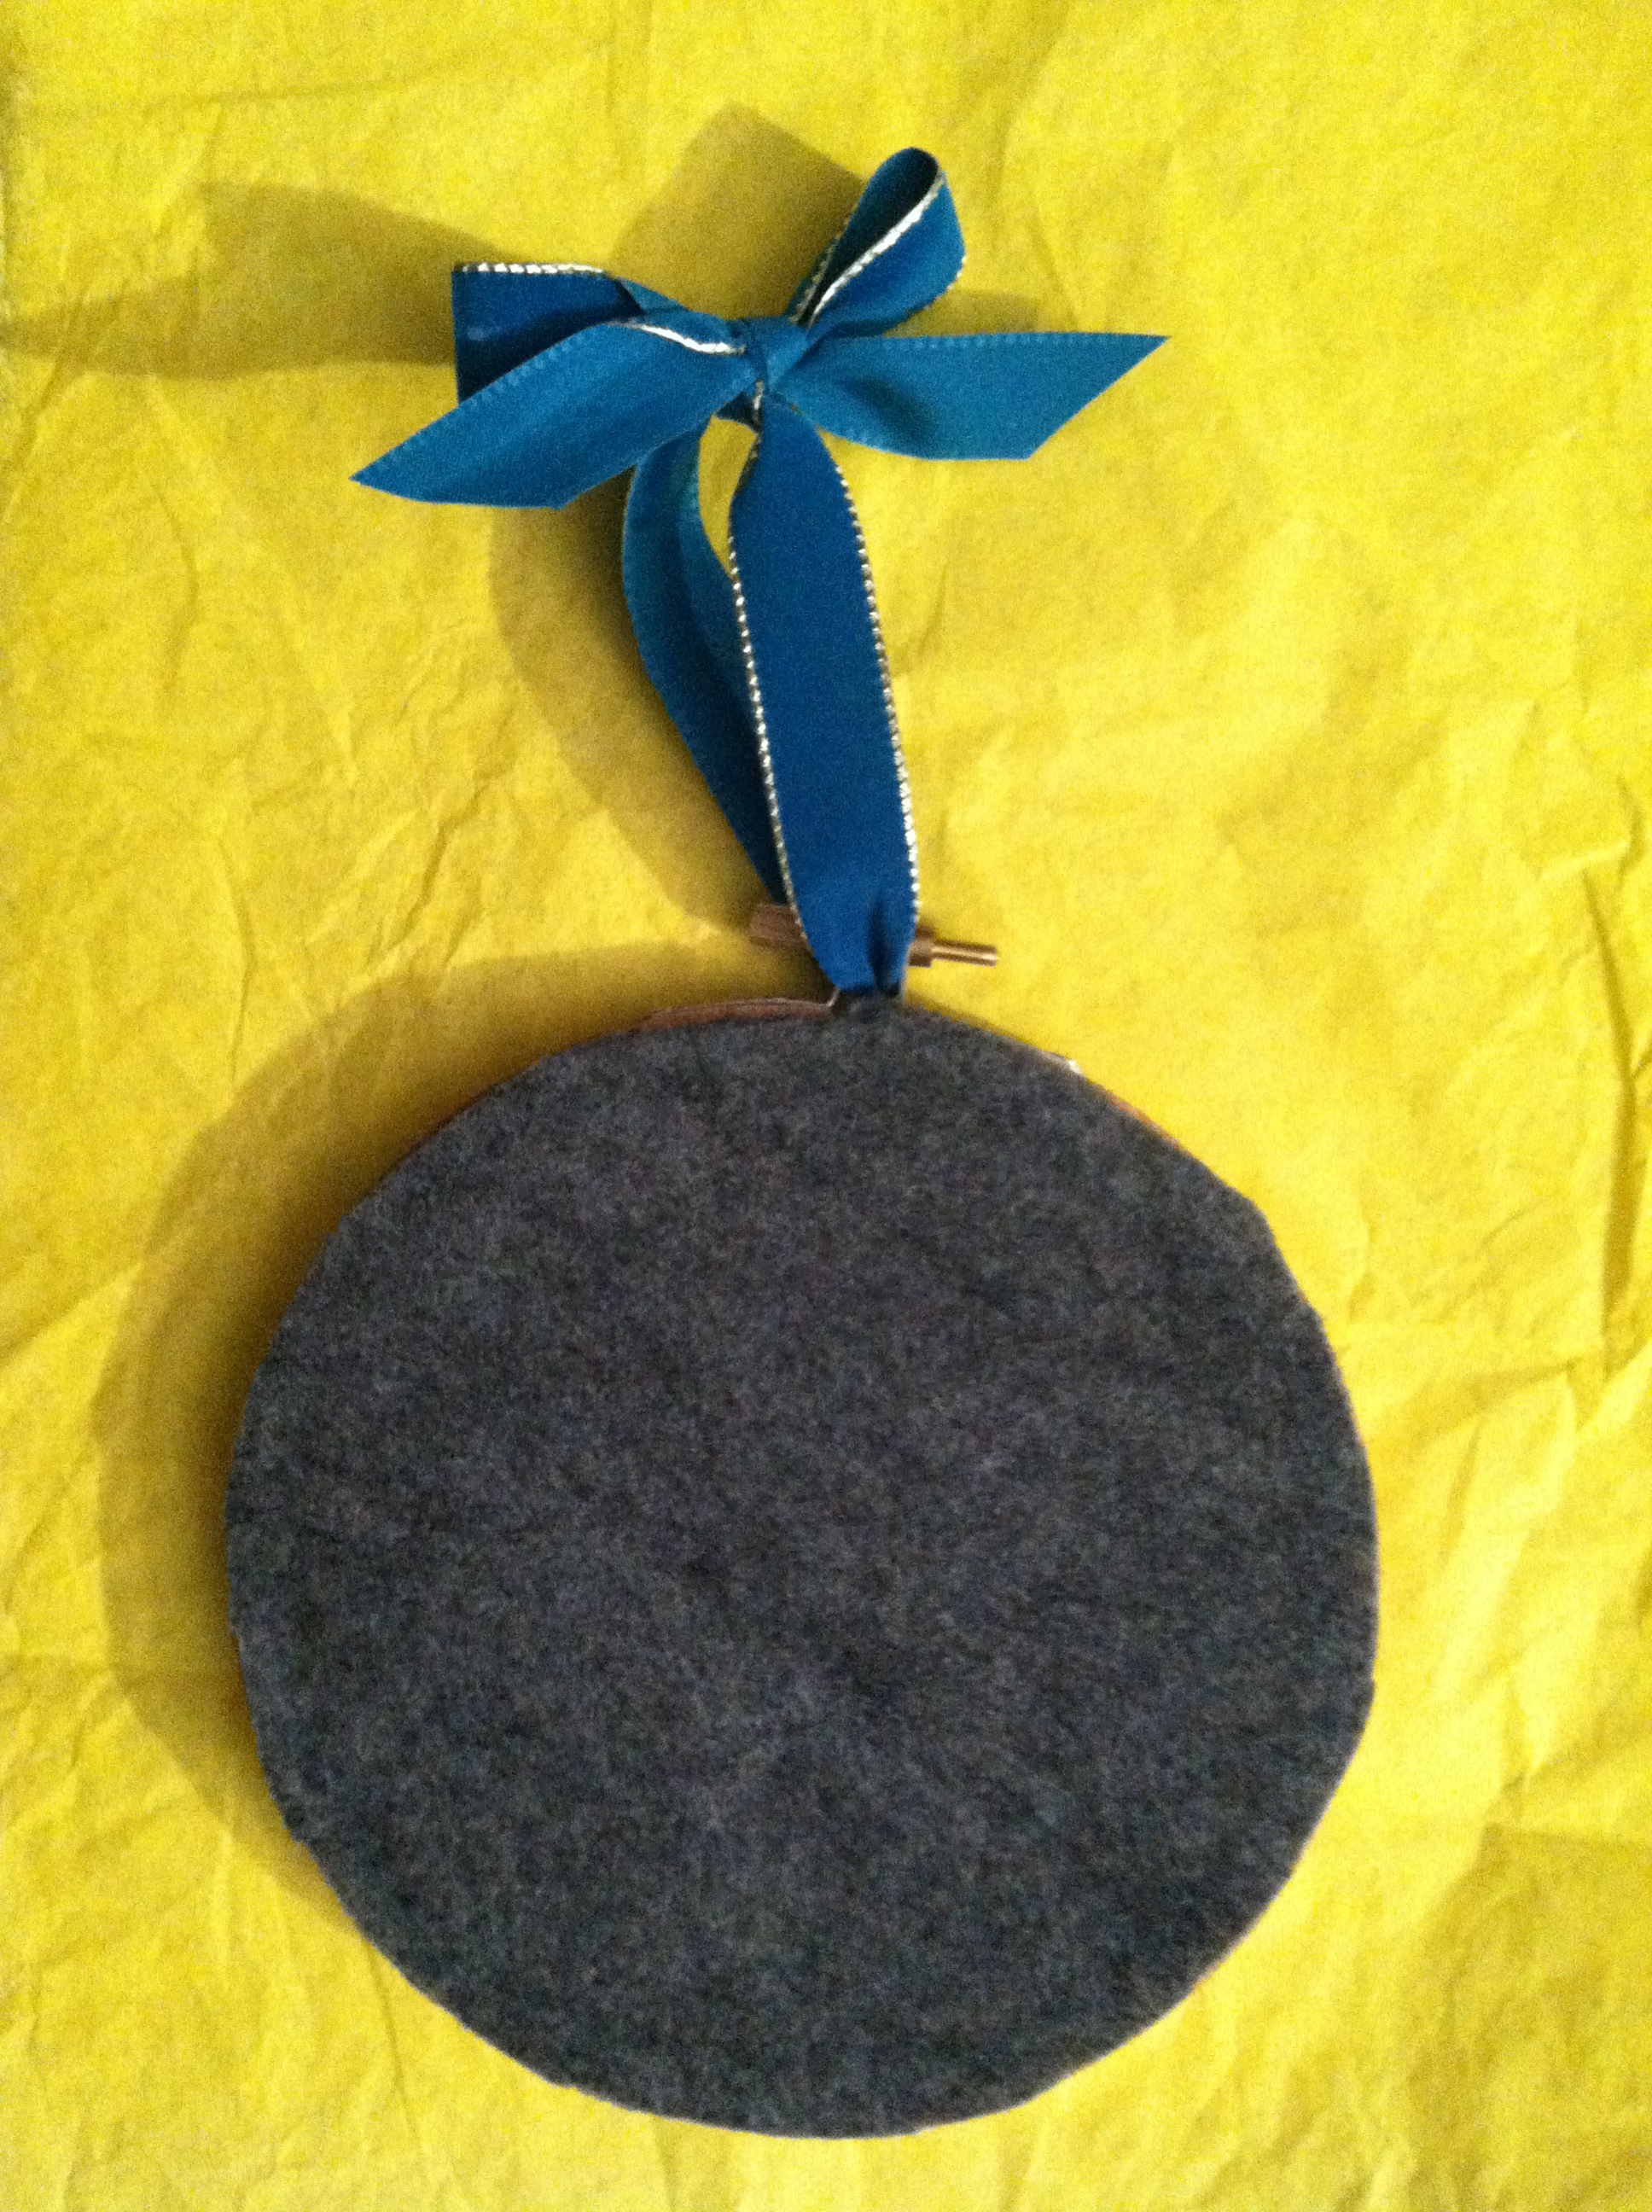
Step 5: To finish it off, I glued another piece of the same colored felt to the back, trimmed the edge, and finished with a bow.*
*This was not my original intent. I wanted to place in a circular picture frame, but I couldn’t find a single store in my neighborhood that carried any – what’s up with that?! Since my expectations and reality didn’t meet up I had to finish up the back the way it’s listed in Step 5. That is definitely NOT the way you usually finish a piece you want to display in a hoop (I will tackle that in a later tutorial).
So there you have it! A super simple craft you can make while jamming to some tunes or during commercial breaks that is a great gift for couples, or even parents (you could stitch their kids names instead). Plus, they never had to know how easy and cheap to make it is! Thanks, grandma interwebs!